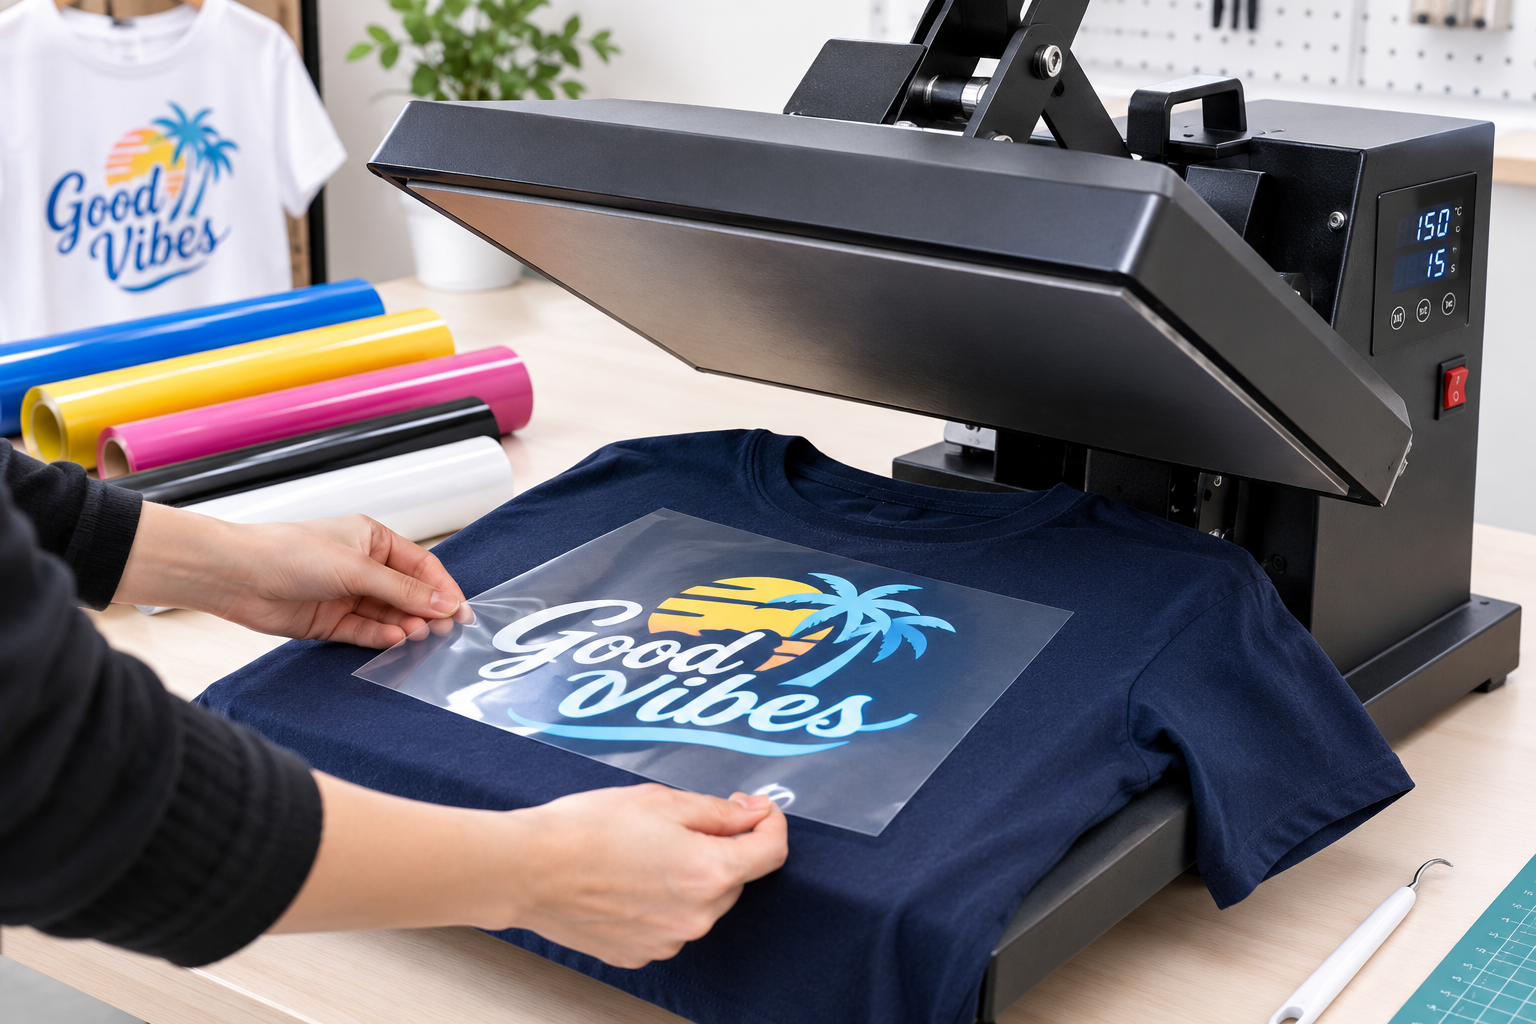
Mistake 1: Using the Wrong Temperature, Pressure, or Time
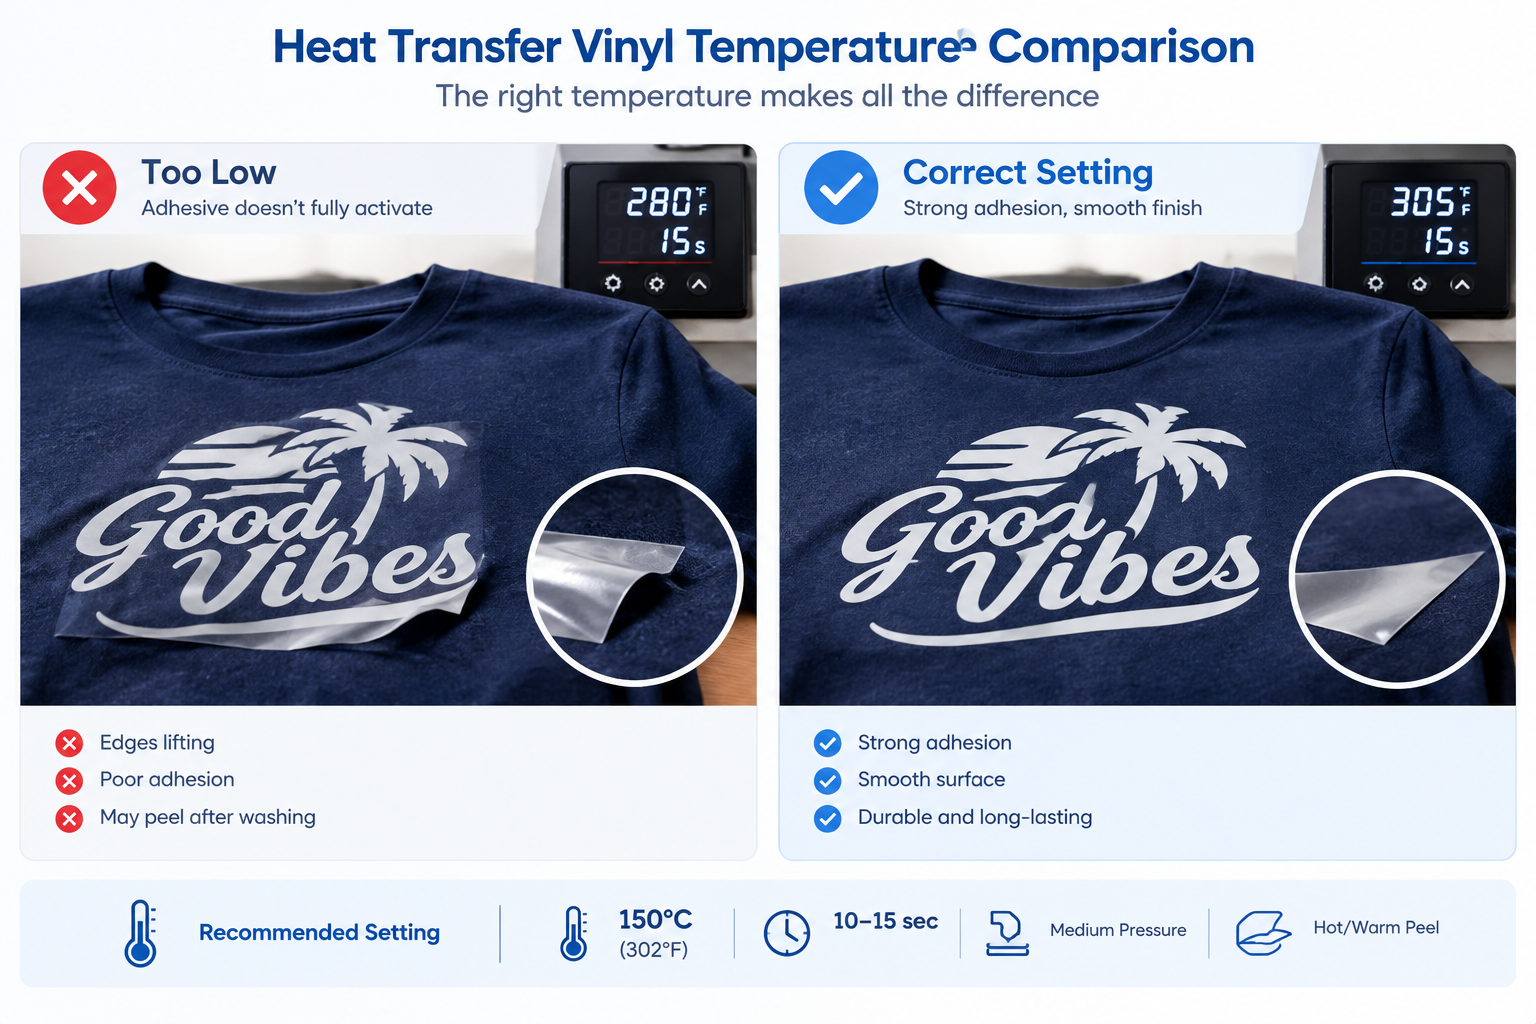
One of the most common HTV mistakes is using the wrong heat press settings.
HTV adhesive needs the right combination of temperature, time, and pressure to bond properly with the fabric. If one of these variables is significantly off, the transfer may look fine immediately after pressing but fail later.
Why Does HTV Fail to Stick?
Temperature too low
If the temperature is too low, the adhesive may not activate properly.
You may notice:
- Edges lifting
- Vinyl peeling from the fabric
- Poor adhesion after washing
- Parts of the design remaining attached to the carrier sheet
Temperature too high
More heat does not automatically create a stronger bond.
Excessive heat can:
- Distort or shrink some HTV materials
- Damage sensitive fabrics
- Cause discoloration
- Affect the appearance of specialty vinyl
- Increase the risk of scorching polyester fabrics
Pressure too light
HTV Vinyl needs sufficient contact with the fabric.
If pressure is too light, parts of the design may not make consistent contact with the garment, resulting in uneven adhesion.
Pressure too heavy
Excessive pressure can also cause problems, particularly with textured or specialty HTV.
It may:
- Flatten textured surfaces
- Create unwanted shine marks
- Distort the material
- Affect thicker HTV designs
Pressing time too short
Even when the temperature is correct, insufficient pressing time may prevent the adhesive from bonding properly.
Pressing time too long
Overheating the same area can damage both the HTV and the garment.
How to Get the Right HTV Settings
The most important rule is simple:
Always start with the manufacturer’s recommended settings for the specific HTV you are using.
There is no universal HTV temperature that works for every material.
Standard PU HTV, glitter HTV, flock HTV, puff HTV, reflective HTV, printable HTV, and other specialty materials may require different application conditions.
Example HTV Settings
The following values can be used as reference examples, but the manufacturer’s instructions for your specific material should take priority.
| HTV Type | Example Temperature | Example Time | Pressure | Peel |
| Standard PU HTV | 305°F / 150°C | 10–15 sec | Medium | Hot/Warm |
| Glitter HTV | 320–340°F / 160–170°C | 15–20 sec | Firm | Cold |
| Flock HTV | 290–305°F / 145–150°C | 12–15 sec | Medium | Cold |
| Puff HTV | Around 290°F / 145°C | 12–15 sec | Medium | Cold |
| Reflective HTV | Around 305°F / 150°C | 15 sec | Medium | Cold |
Important: These are not universal settings. HTV formulations differ between manufacturers, and fabric type also affects the application process.
Check Your Heat Press Temperature
- A heat press may display 305°F, but the actual platen temperature can differ.
- If you regularly use HTV, consider checking the platen with an appropriate temperature measurement tool.
- If your press is actually cooler than the displayed temperature, the adhesive may not receive enough heat to bond properly.
Consider the Fabric
The garment matters just as much as the HTV.
Cotton is generally more heat tolerant than many synthetic fabrics. Polyester and other heat-sensitive materials may require lower application temperatures or special HTV designed for those fabrics.
For polyester, you should also consider the risk of dye migration, particularly when using high heat.
Always test your application on a scrap piece of the same or similar fabric before producing the final garment.
Best Practice
Before pressing your final design:
- Check the HTV manufacturer’s instructions.
- Confirm the fabric type.
- Set temperature and time.
- Adjust pressure appropriately.
- Pre-press the garment.
- Test on scrap fabric.
- Apply the final design only after the test succeeds.
Mistake 2: Peeling HTV at the Wrong Temperature
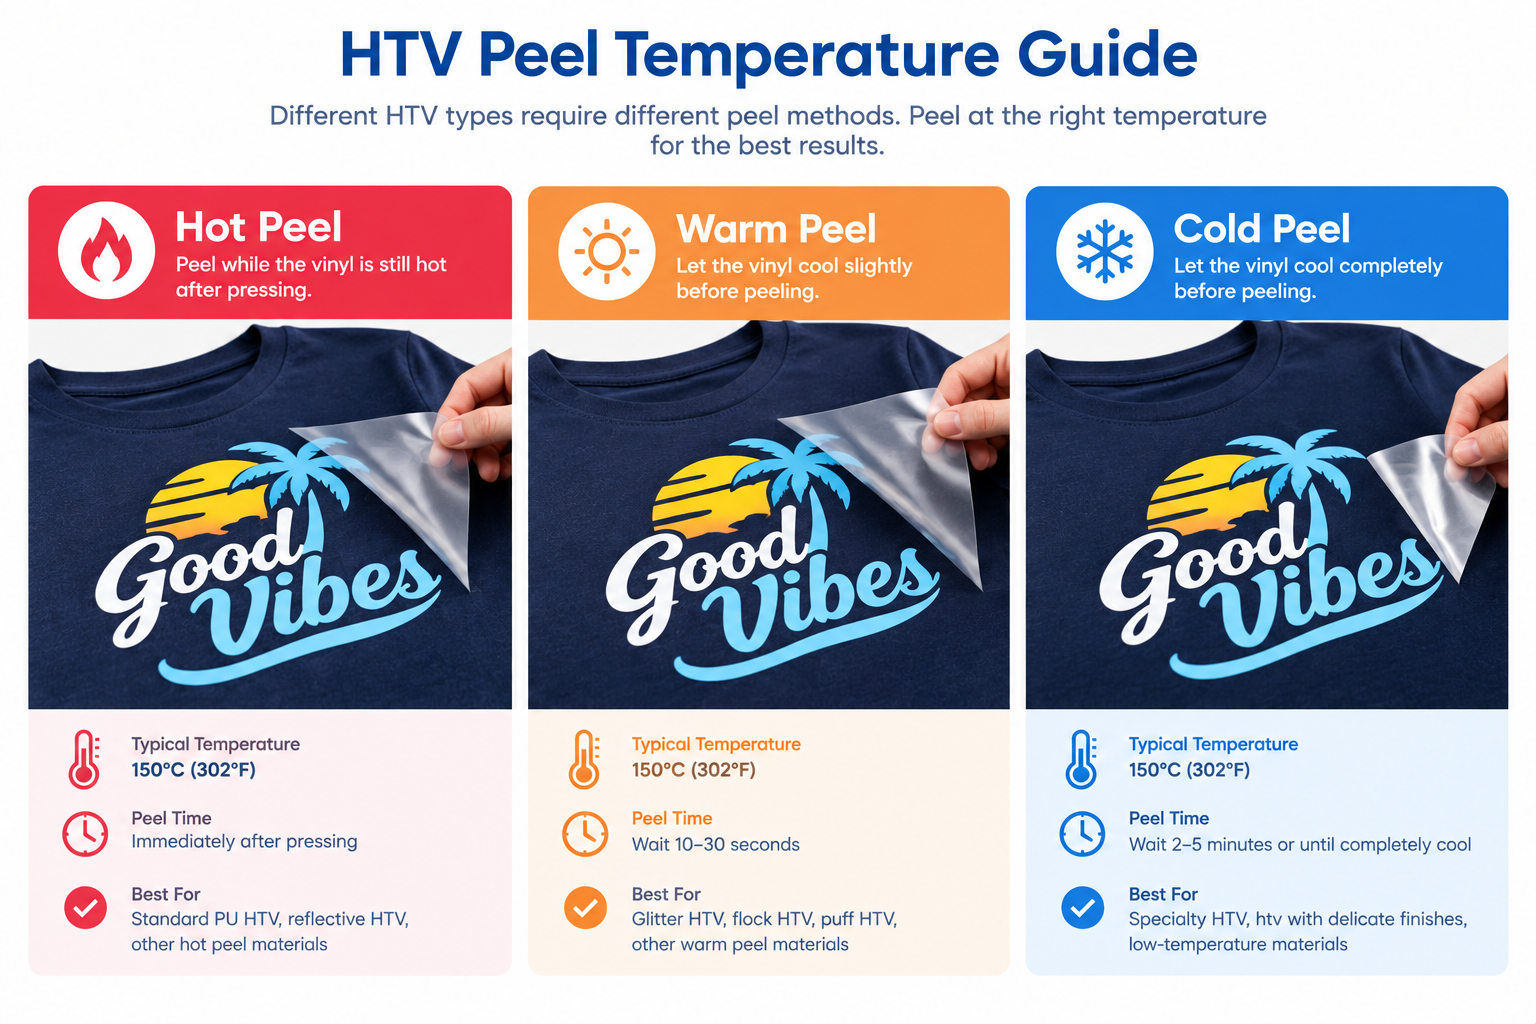
You pressed the design correctly—but when you remove the carrier sheet, the vinyl comes up with it.
This is often a peel-temperature problem.
Different HTV products use different carrier and adhesive systems. Some are designed for hot peeling, while others need to cool before the carrier is removed.
Hot Peel vs. Cold Peel HTV
Hot Peel
Hot peel HTV should generally be peeled shortly after pressing while the material is still hot.
Warm Peel
Warm peel HTV requires the carrier to cool slightly before removal.
Cold Peel
Cold peel HTV needs to cool completely before you remove the carrier.
Removing a cold-peel material while it is still hot can cause the vinyl to lift from the garment.
On the other hand, waiting too long with some hot-peel materials can make carrier removal more difficult.
How to Fix HTV That Lifts With the Carrier
If the vinyl starts lifting:
- Stop peeling.
- Place the carrier sheet back over the design.
- Re-press according to the manufacturer’s recommended settings.
- Allow the material to reach the correct peel temperature.
- Peel the carrier again carefully.
Do not simply increase the temperature without checking the manufacturer’s instructions.
For partially lifted edges, you can often place a protective sheet over the design and briefly repress the affected area if the HTV Vinyl manufacturer’s instructions allow it.
Mistake 3: Poor Cutting and Weeding Technique
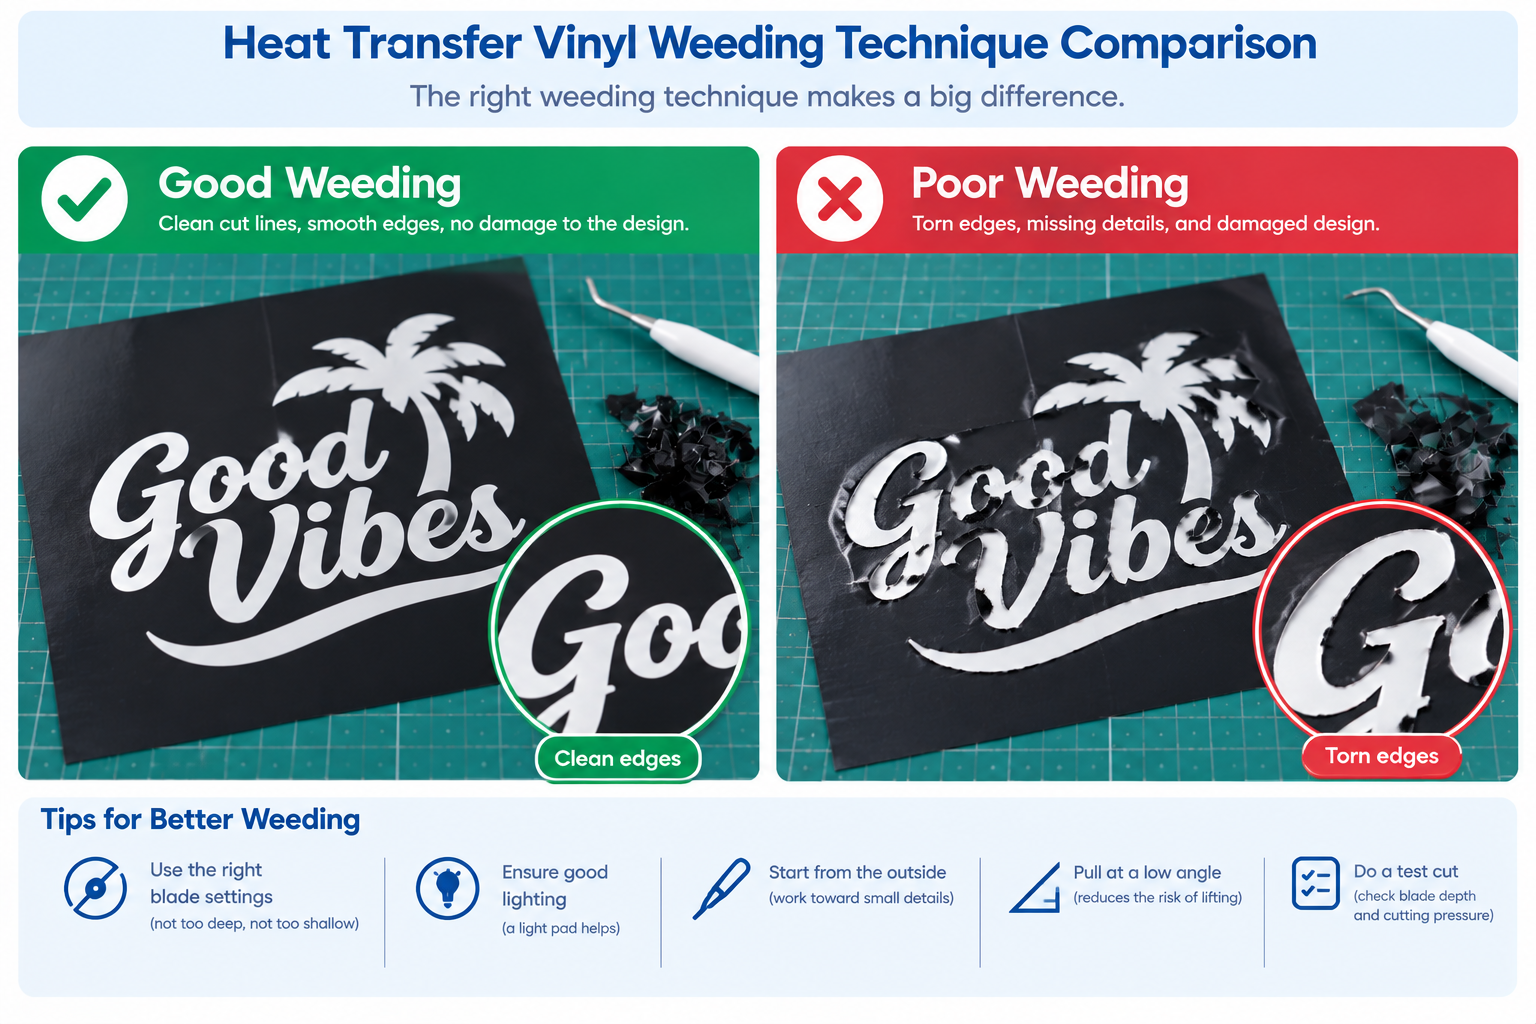
Not every HTV problem starts at the heat press.
Sometimes the problem begins when you cut or weed the vinyl.
Weeding means removing the excess vinyl around your design. Poor cutting settings, dull blades, bad lighting, or aggressive weeding can damage small letters and intricate details.
Common Weeding Problems
Using the wrong blade settings
- If the blade doesn’t cut deeply enough, the vinyl can be difficult to weed.
- If the blade cuts too deeply, you may damage the carrier sheet or create distorted edges.
Using a dull blade
A dull blade can tear rather than cleanly cut the HTV.
This becomes especially noticeable with:
- Small text
- Thin lines
- Intricate graphics
- Small gaps
- Detailed logos
Poor lighting
- Fine cut lines can be difficult to see under poor lighting.
- A bright work light or light pad can make small details much easier to identify.
Pulling the vinyl too aggressively
- Pulling too quickly or at the wrong angle can lift parts of the design that should remain on the carrier.
How to Weed HTV More Easily
Start from the outside
Begin by removing the large areas of excess vinyl around the design.
Then move toward smaller internal areas such as the centers of letters like:
- O
- A
- P
- R
- B
Pull at a low angle
Pulling the excess vinyl at a low angle can help reduce the chance of lifting small parts of the design.
Use the right tools
A sharp weeding hook and fine-tip tweezers can make detailed designs much easier to weed.
Run a test cut
Before cutting an entire sheet of HTV, perform a small test cut.
This allows you to check:
- Blade depth
- Cutting pressure
- Cut quality
- Fine detail
- Weeding performance
A two-minute test cut can save an entire sheet of vinyl.
What If Small Letters Keep Tearing?
If small letters or thin lines tear during weeding, don’t immediately assume the HTV is defective.
Check:
- Blade condition
- Blade depth
- Cutting pressure
- Cutting speed
- Design size
- Vinyl quality
For extremely small designs, increasing the size of thin elements may also improve weeding performance.
Mistake 4: Skipping the Pre-Press
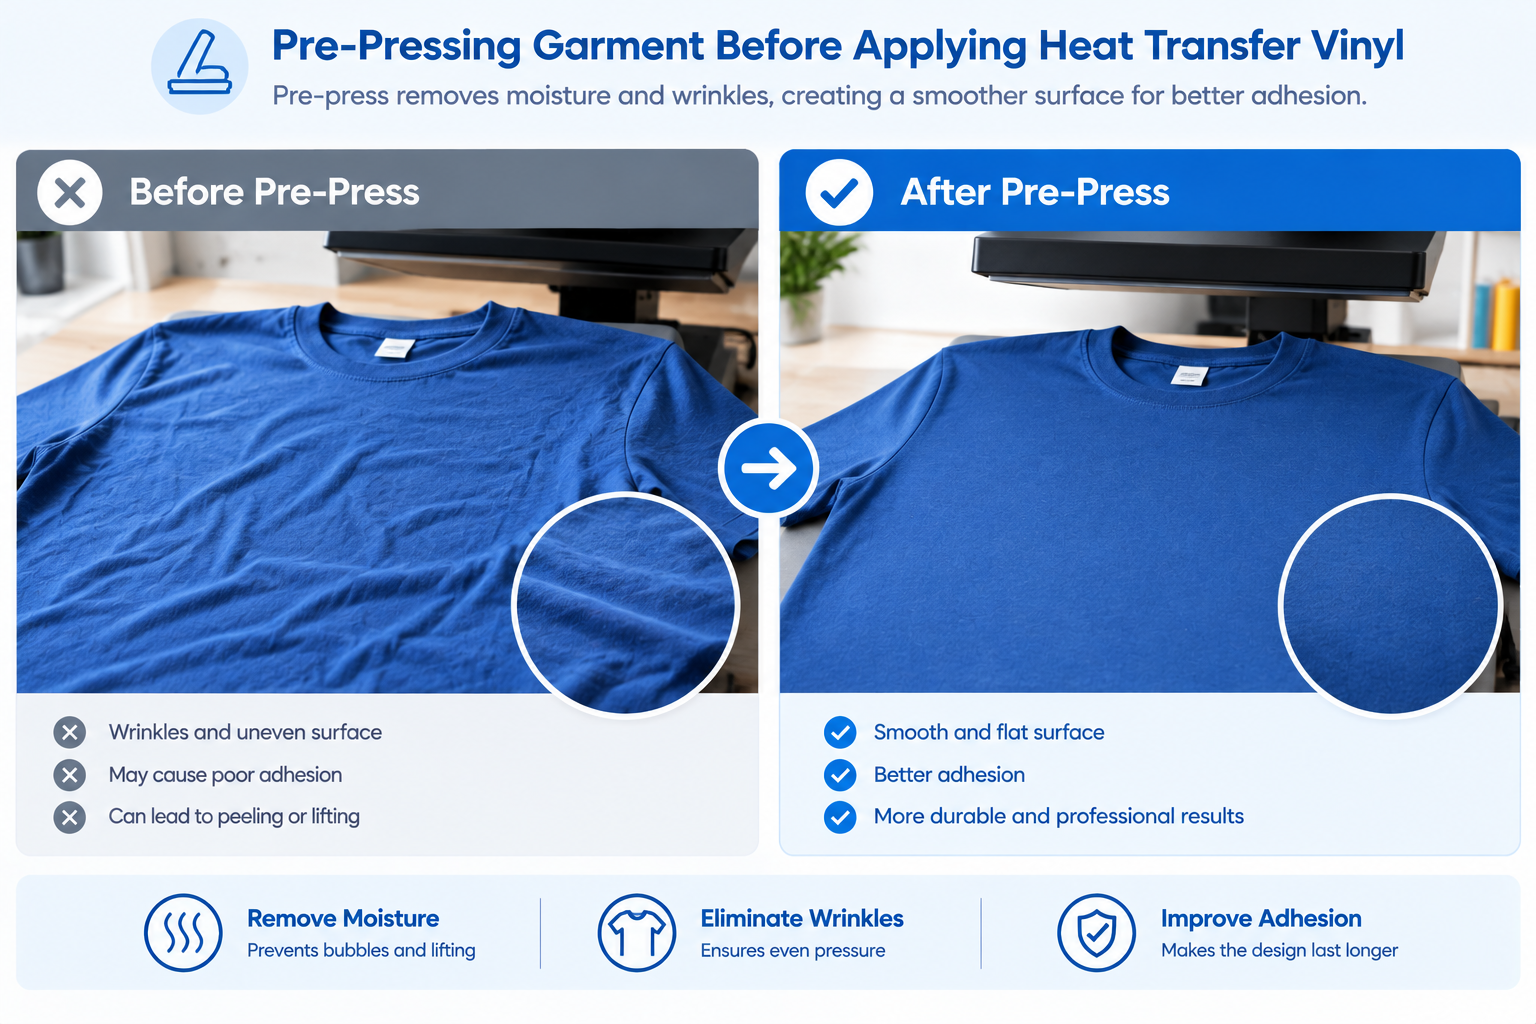
Pre-pressing the garment is a small step that can make a significant difference.
Before applying HTV, briefly pressing the garment helps remove moisture and wrinkles and creates a flatter surface.
Why Pre-Pressing Matters
Moisture
Fabric can contain moisture from humidity or previous washing.
When exposed to heat, moisture can turn into steam and interfere with the transfer process.
Wrinkles
Wrinkles can create uneven pressure.
If part of the design is sitting over a fold, the HTV may not receive the same pressure as the rest of the design.
Dust and debris
Lint, dust, oils, and fabric residue can interfere with adhesion.
Fabric softener
Fabric softener residue may reduce the ability of the adhesive to bond properly with the fabric.
How to Pre-Press a Garment
A common approach is to pre-press the garment for approximately 3–5 seconds, but follow the HTV manufacturer’s instructions when they specify otherwise.
Before pressing:
- Place the garment flat.
- Remove wrinkles.
- Use a lint roller to remove dust and fibers.
- Pre-press briefly.
- Position your HTV.
- Apply the transfer using the recommended settings.
Avoid Seams, Zippers, and Uneven Areas
Uneven surfaces can create inconsistent pressure.
Avoid placing important parts of the design directly over:
- Seams
- Zippers
- Buttons
- Thick hems
- Pockets
If you need to press near an uneven area, a pressing pillow or suitable heat-press accessory can help create a more even pressing surface.
Mistake 5: Washing HTV Too Soon or Incorrectly
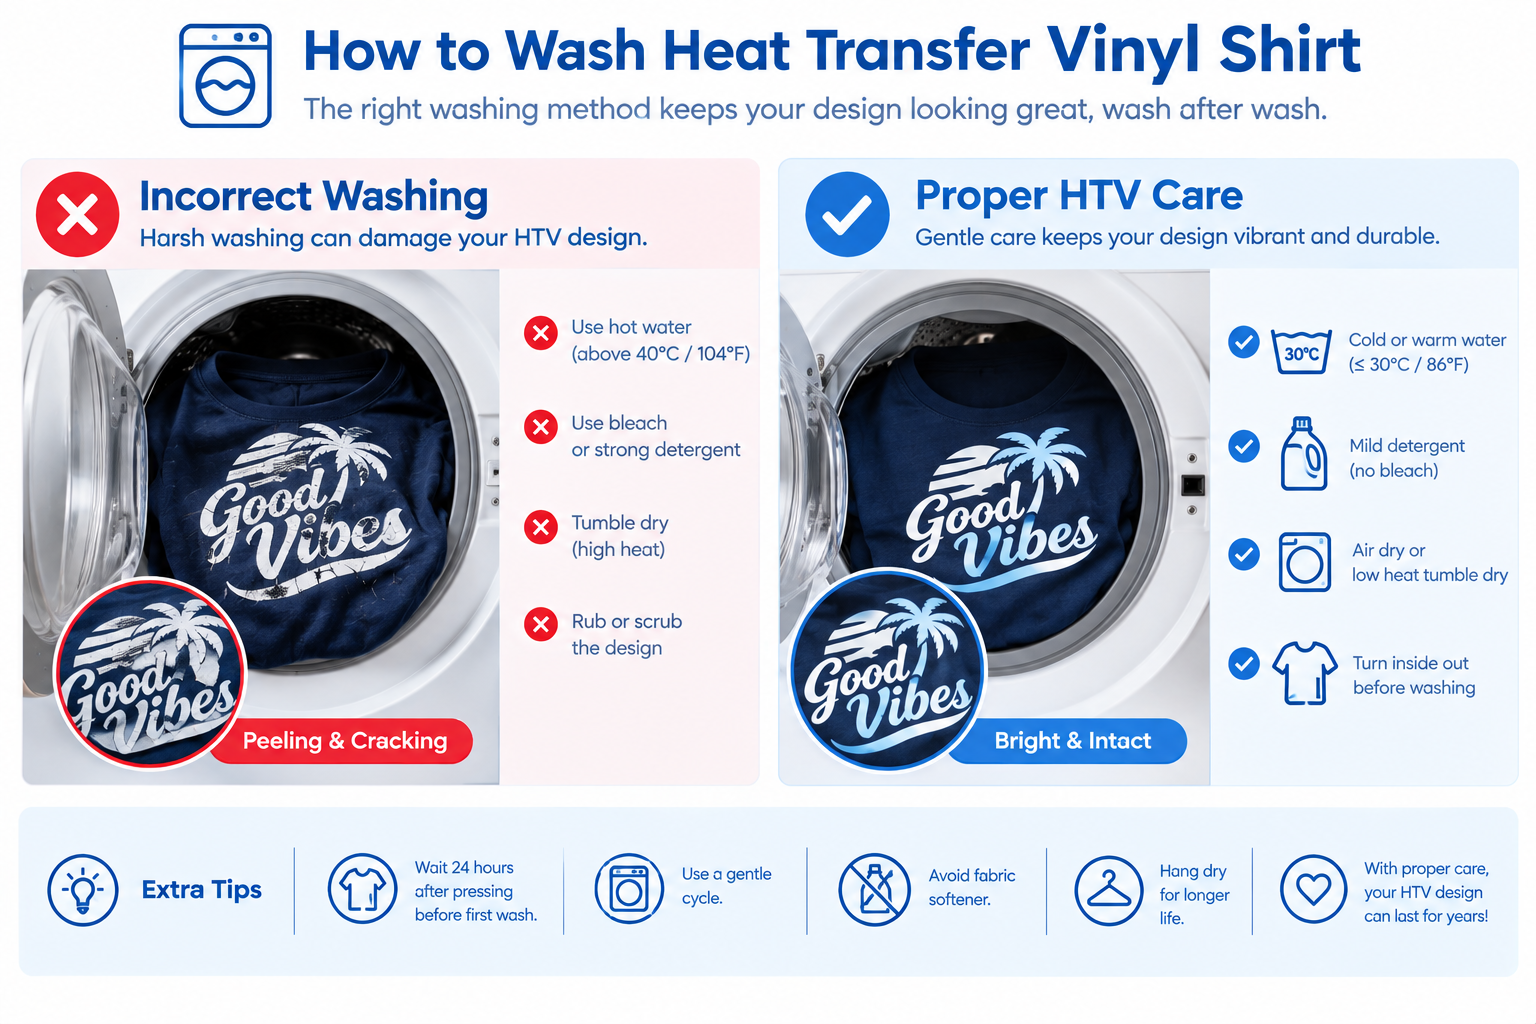
Your HTV looks perfect after pressing.
Then you wash the shirt—and the design starts peeling or cracking.
This is one of the most frustrating HTV problems because the application may have looked successful initially.
Don’t Wash the Garment Immediately
Many HTV manufacturers recommend waiting at least 24 hours before the first wash, while some products may recommend a longer period.
Always follow the care instructions supplied with your specific HTV.
The adhesive needs time to settle and bond with the fabric after application.
How to Wash HTV Shirts
For general HTV care:
Turn the garment inside out
This reduces direct friction against the vinyl during washing.
Use cold or cool water
Hot water can place additional stress on heat-activated adhesive systems and may shorten the life of some HTV applications.
Use a gentle cycle
A gentler wash cycle reduces mechanical stress on the design.
Use mild detergent
Avoid unnecessary exposure to bleach, harsh chemicals, or fabric softeners unless the HTV manufacturer’s care instructions specifically allow them.
Avoid rough garments in the same load
Zippers, metal buttons, rivets, and other hard surfaces can rub against the HTV and cause abrasion.
How to Dry HTV Garments
Air drying is generally the safest option.
If you use a dryer:
- Turn the garment inside out.
- Use low heat.
- Avoid high-temperature drying.
Excessive dryer heat can contribute to cracking, lifting, or premature wear.
Can You Iron HTV?
Do not place a hot iron directly on the vinyl.
If ironing is necessary, protect the HTV with an appropriate cloth or protective sheet and follow the manufacturer’s instructions.
How to Fix Heat Transfer Vinyl Mistakes After They Happen
Not every HTV mistake means the garment has to be thrown away.
The correct repair depends on what went wrong.
If the HTV Is Peeling
- If only a small edge has lifted, you may be able to re-press the area.
- Place a suitable protective sheet over the design and reapply heat using the manufacturer’s recommended settings.
- Make sure the garment is completely dry before attempting a repair.
- If the entire design has lost adhesion, replacing the design may be more reliable than repeatedly repressing it.
If the HTV Is Cracking
Cracking can be related to:
- Incorrect application settings
- Excessive heat
- Excessive pressure
- Material characteristics
- Excessive stretching
- Improper washing or drying
Once vinyl is physically cracked, it usually cannot be restored to its original condition.
In that situation, removing the damaged design and applying a new one is often the better solution.
If the Design Is Misaligned
If you notice the problem immediately after pressing, you may be able to carefully remove the material while it is still warm, depending on the garment and HTV.
If the design has already cooled and bonded strongly, removal becomes more difficult and may damage the fabric.
For valuable garments, test any HTV removal method on a similar scrap fabric first.
If Weeding Is Difficult
Stop before you ruin the design.
Run a small test cut and adjust the blade depth or cutting pressure.
Also check whether:
- The blade is dull
- The design is too small
- The vinyl is unsuitable for very fine details
- The cutting speed is too high