If you’ve ever spent hours designing the perfect graphic, carefully printing it onto printable heat transfer vinyl, only to watch the design shift, tear, or misalign during transfer—you know the frustration. The vision was there. The execution? Not quite.
That’s where the right combination of materials makes all the difference.
Printable heat transfer vinyl (HTV) has opened up incredible possibilities for crafters. You can now print any design—photographs, gradients, intricate illustrations—directly from your inkjet printer and transfer it onto fabric. But here’s the catch: unlike standard HTV that comes with a built-in carrier sheet, printable HTV often requires a separate transfer mask or tape to lift the design off its backing and move it onto your garment.
Without the right transfer tape, you’re left wrestling with misaligned designs, wrinkled transfers, and wasted materials. With it? Everything clicks into place.
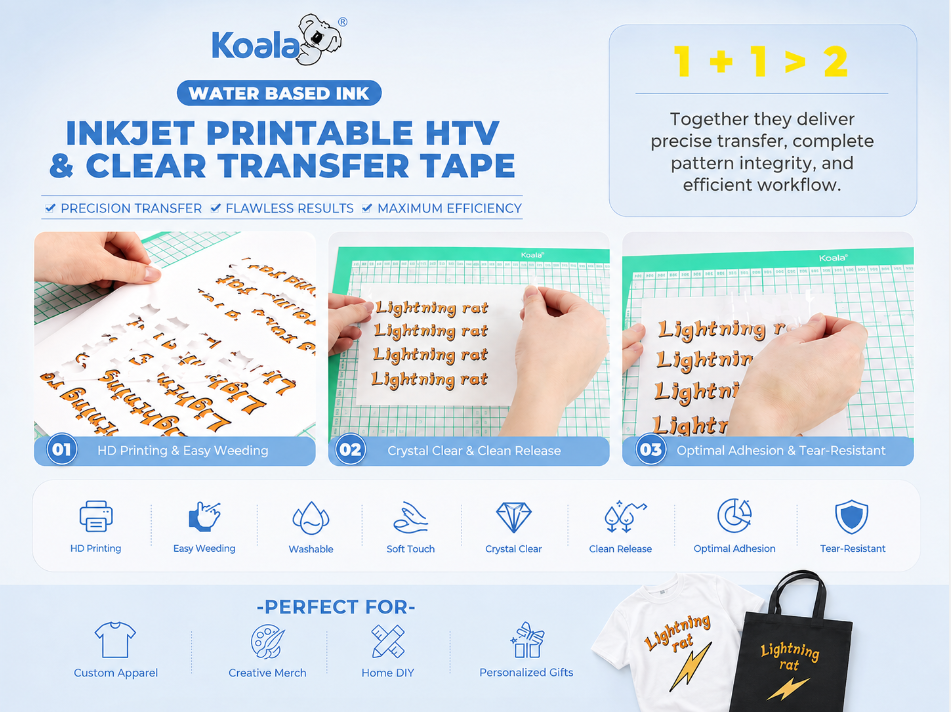
Enter the Koala Inkjet Printable HTV & Clear Transfer Tape Set. Together, they deliver something greater than the sum of their parts. 1 + 1 > 2.
What Is Inkjet Printable HTV?
Before we dive into the combo, let’s clarify what we’re working with.
Inkjet printable HTV is a plain, non-sticky vinyl sheet that acts as a blank canvas. You feed it through your standard inkjet printer—just like you would with paper—and print your design directly onto the surface. Once printed, you cut the design (using a cutting machine like Cricut or Silhouette, or even scissors for simpler shapes), weed away the excess material, and then heat-press the design onto fabric.
The beauty of printable HTV is that it removes the limitations of traditional cut vinyl. With standard HTV, you’re restricted to solid colors and simple shapes. With printable HTV, you can print full-color photographs, gradient backgrounds, watercolor effects, and highly detailed illustrations. The creative possibilities are virtually endless.
However, there’s a trade-off. While standard HTV ships with a clear polyester carrier sheet already bonded to the vinyl (which acts as its built-in transfer tape), printable HTV typically does not. The carrier sheet is what holds all the pieces of your design together during the transfer process—and without it, you need something else to do the job.
Why Printable HTV Needs Transfer Tape
Here’s the honest truth: for 95% of standard HTV work, you don’t need separate transfer tape—the factory carrier does the job. But printable HTV is different.
When you print onto printable HTV and cut your design, you’re left with a weeded design sitting on its release liner. But there’s no carrier sheet holding everything together. If you try to pick up the design with your fingers, individual elements can shift, stretch, or tear. Complex designs with multiple small pieces become nearly impossible to transfer intact.
This is where transfer tape becomes essential.
Transfer tape—sometimes called application tape, masking tape, or transfer mask—is a clear or paper-backed adhesive film. Its job is simple but crucial: it lifts your weeded design off the release liner, holds all the pieces in perfect alignment, and allows you to position the entire design onto your garment in one smooth motion.
Think of it like painter’s tape helping you place a stencil. It doesn’t become the final decoration. It helps you pick up the design, keep the pieces aligned, and move that design exactly where it belongs.
What Makes a Great Transfer Tape?
Not all transfer tapes are created equal. Here’s what to look for—and what the Lightning Rat Clear Transfer Tape delivers:
Crystal-Clear Surface
A transparent tape allows you to see exactly where you’re placing your design. There’s no guesswork, no misalignment, no frustrating “I thought it was straight” moments. You can position your design with surgical precision.
Clean Release
The best transfer tapes lift your design cleanly and release without leaving any sticky residue behind. Nothing ruins a beautiful garment like adhesive residue that won’t wash out.
Optimal Tack
The tape needs to be sticky enough to lift the vinyl design securely, but not so sticky that it damages the printed surface or refuses to release. It’s a delicate balance—and the right tape strikes it perfectly.
Heat Resistance
Since the tape is used in the heat press process, it needs to withstand the temperatures required for HTV application without losing its shape or grip.
The 1 + 1 > 2 Effect
Here’s where the magic happens.
On their own, printable HTV and transfer tape are useful materials. But together, they create something far greater—a seamless, professional-grade workflow that saves time, eliminates frustration, and delivers flawless results every time.
Precision Transfer
The transfer tape holds your entire design—every letter, every detail, every tiny element—in perfect alignment. When you place it on your garment, what you see is what you get. No shifting. No gaps. No “oops” moments.
Complete Pattern Integrity
Complex designs with multiple pieces stay exactly where they’re supposed to be. The transfer tape acts as a temporary carrier, preserving the integrity of your pattern from the cutting mat all the way to the heat press.
Efficient Workflow
No more wrestling with misaligned designs or redoing transfers because something went wrong. The combo streamlines the entire process—print, cut, weed, tape, press, peel. Fast, clean, professional.
1 + 1 > 2 isn’t just a catchy phrase. It’s the reality of what happens when you pair the right printable HTV with the right transfer tape.
Step-by-Step: How to Use the Combo
Step 1: Create Your Design
Design your artwork in your preferred software (Cricut Design Space, Silhouette Studio, Adobe Illustrator, etc.). Remember to mirror your design horizontally before printing—this is essential for HTV applications.
Step 2: Print
Load your Lightning Rat Inkjet Printable HTV sheet into your inkjet printer. Print your design onto the vinyl surface. Allow the ink to dry completely—roughly 10 minutes is recommended.
Step 3: Cut
Place the printed HTV sheet onto your cutting mat. If using a cutting machine, ensure the blade cuts through the vinyl layer only, not the backing sheet. Cut your design following the contour lines.
Step 4: Weed
Using a weeding hook, carefully remove the excess vinyl from around your design. Anything you want to appear on the final garment stays on the backing. Everything else gets pulled away.
Step 5: Apply Transfer Tape
Peel the Koala Clear Transfer Tape from its liner. Place it over your weeded design, adhesive side down. Use a squeegee or scraper to burnish (rub) the tape firmly, ensuring it grips the entire design.
Step 6: Lift the Design
Carefully peel the transfer tape upward at a 90-degree angle. The vinyl design should lift cleanly off its backing, now held securely by the transfer tape.
Step 7: Position and Press
Place the design onto your garment in the desired position. The crystal-clear tape allows you to align it perfectly. Apply heat using a heat press or iron, following the temperature and time guidelines for your specific HTV.
Step 8: Peel the Tape
After pressing, peel the transfer tape away. For best results, peel while the material is still warm. The tape should release cleanly, leaving your design perfectly transferred onto the fabric.
Perfect For
This versatile combo opens up a world of creative possibilities. Here’s what it’s perfect for:
Custom T-Shirts & Apparel
From simple text designs to full-color photographs, the combo delivers professional results on t-shirts, hoodies, and more.
Tote Bags & Accessories
Personalize canvas totes, aprons, hats, and bags with custom designs that stand out.
Small Business Merchandise
Create branded merchandise for your business—team shirts, promotional items, customer gifts—with consistent, high-quality results.
DIY Craft Projects
Whether you’re making gifts for friends or decorating items for your home, the combo gives you creative freedom.
Personalized Gifts
Birthday presents, holiday gifts, wedding favors—custom apparel makes any gift more meaningful.
Conclusion
Printable HTV has revolutionized what’s possible in the crafting world. No longer limited to solid colors and simple shapes, you can now create photorealistic, full-color designs that rival professional screen printing.
The Koala Inkjet Printable HTV & Clear Transfer Tape Set gives you everything you need in one convenient package.
Together, they deliver precision transfer, complete pattern integrity, and maximum efficiency. They turn a potentially frustrating process into a smooth, professional workflow that produces flawless results every time.
1 + 1 > 2. It’s not just math. It’s the difference between a project that fights you and a project that flows.